Ruby on Rails
This section investigates how to migrate multi-tenant Rails applications to a Citus storage backend. We’ll use the activerecord-multi-tenant Ruby gem for easier scale-out.
This Ruby gem has evolved from our experience working with customers scaling out their multi-tenant apps. It patches some restrictions that ActiveRecord and Rails currently have when it comes to automatic query building. It is based on the excellent acts_as_tenant library, and extends it for the particular use-case of a distributed multi-tenant database like Citus.
Preparing to scale-out a multi-tenant application
Initially you’ll often start out with all tenants placed on a single database node, and using a framework like Ruby on Rails and ActiveRecord to load the data for a given tenant when you serve a web request that returns the tenant’s data.
ActiveRecord makes a few assumptions about the data storage that limit
your scale-out options. In particular, ActiveRecord introduces a pattern
where you normalize data and split it into many distinct models each
identified by a single id column, with multiple belongs_to
relationships that tie objects back to a tenant or customer:
# typical pattern with multiple belongs_to relationships

class Customer < ActiveRecord::Base
  has_many :sites
end
class Site < ActiveRecord::Base
  belongs_to :customer
  has_many :page_views
end
class PageView < ActiveRecord::Base
  belongs_to :site
end
The tricky thing with this pattern is that in order to find all page views for a customer, you’ll have to query for all of a customer’s sites first. This becomes a problem once you start sharding data, and in particular when you run UPDATE or DELETE queries on nested models like page views in this example.
There are a few steps you can take today, to make scaling out easier in the future:
1. Introduce a column for the tenant_id on every record that belongs to a tenant
In order to scale out a multi-tenant model, it’s essential you can locate
all records that belong to a tenant quickly. The easiest way to achieve
this is to simply add a tenant_id column (or “customer_id” column,
etc) on every object that belongs to a tenant, and backfilling your
existing data to have this column set correctly.
When you move to a distributed multi-tenant database like Citus in the future, this will be a required step - but if you’ve done this before, you can simply COPY over your data, without doing any additional data modification.
2. Use UNIQUE constraints which include the tenant_id
Unique and foreign-key constraints on values other than the tenant_id will present a problem in any distributed system, since it’s difficult to make sure that no two nodes accept the same unique value. Enforcing the constraint would require expensive scans of the data across all nodes.
To solve this problem, for the models which are logically related to a store (the tenant for our app), you should add store_id to the constraints, effectively scoping objects uniquely inside a given store. This helps add the concept of tenancy to your models, thereby making the multi-tenant system more robust.
For example, Rails creates a primary key by default, that only includes
the id of the record:
Indexes:
    "page_views_pkey" PRIMARY KEY, btree (id)
You should modify that primary key to also include the tenant_id:
ALTER TABLE page_views DROP CONSTRAINT page_views_pkey;
ALTER TABLE page_views ADD PRIMARY KEY(id, customer_id);
An exception to this rule might be an email or username column on a users table (unless you give each tenant their own login page), which is why, once you scale out, we typically recommend these to be split out from your distributed tables and placed as a local table on the Citus coordinator node.
3. Include the tenant_id in all queries, even when you can locate an object using its own object_id
The easiest way to run a typical SQL query in a distributed system without restrictions is to always access data that lives on a single node, determined by the tenant you are accessing.
For this reason, once you use a distributed system like Citus, we recommend you always specify both the tenant_id and an object’s own ID for queries, so the coordinator can locate your data quickly, and can route the query to a single shard - instead of going to each shard in the system individually and asking the shard whether it knows the given object_id.
Updating the Rails Application
You can get started by including gem 'activerecord-multi-tenant'
into your Gemfile, running bundle install, and then annotating your
ActiveRecord models like this:
class PageView < ActiveRecord::Base
  multi_tenant :customer
  # ...
end
In this case customer is the tenant model, and your page_views
table needs to have a customer_id column that references the
customer the page view belongs to.
The activerecord-multi-tenant Ruby gem aims to make it easier to implement the above data changes in a typical Rails application.
Note
The library relies on the tenant id column to be present and non-null for all rows. However, it is often useful to have the library set the tenant id for new records, while backfilling missing tenant id values in existing records as a background task. This makes it easier to get started with activerecord-multi-tenant.
To support this, the library has a write-only mode, in which the tenant id column is not filtered in queries, but is set properly for new records. Include the following in a Rails initializer to enable it:
MultiTenant.enable_write_only_mode
Once you are ready to enforce tenancy, add a NOT NULL constraint to your tenant_id column and simply remove the initializer line.
As mentioned in the beginning, by adding multi_tenant :customer
annotations to your models, the library automatically takes care of
including the tenant_id with all queries.
In order for that to work, you’ll always need to specify which tenant you are accessing, either by specifying it on a per-request basis:
class ApplicationController < ActionController::Base
  # Opt-into the "set_current_tenant" controller helpers by specifying this:
  set_current_tenant_through_filter

  before_filter :set_customer_as_tenant

  def set_customer_as_tenant
    customer = Customer.find(session[:current_customer_id])
    set_current_tenant(customer) # Set the tenant
  end
end
Or by wrapping your code in a block, e.g. for background and maintenance tasks:
customer = Customer.find(session[:current_customer_id])
# ...
MultiTenant.with(customer) do
  site = Site.find(params[:site_id])

  # Modifications automatically include tenant_id
  site.update! last_accessed_at: Time.now

  # Queries also include tenant_id automatically
  site.page_views.count
end
Once you are ready to use a distributed multi-tenant database like Citus, all you need is a few adjustments to your migrations, and you’re good to go:
class InitialTables < ActiveRecord::Migration
  def up
    create_table :page_views, partition_key: :customer_id do |t|
      t.references :customer, null: false
      t.references :site, null: false

      t.text :url, null: false
      ...
      t.timestamps null: false
    end
    create_distributed_table :page_views, :account_id
  end

  def down
    drop_table :page_views
  end
end
Note the partition_key: :customer_id, something that’s
added to Rails’ create_table by our library, which ensures
that the primary key includes the tenant_id column, as well as
create_distributed_table which enables Citus to scale out the data
to multiple nodes.
Updating the Test Suite
If the test suite for your Rails application uses the
database_cleaner gem to reset the test database between
runs, be sure to use the “truncation” strategy rather than
“transaction.” We have seen occasional failures during transaction
rollbacks in the tests. The database_cleaner documentation has
instructions for changing the cleaning strategy.
Continuous Integration
The easiest way to run a Citus cluster in continuous integration is by using the official Citus Docker containers. Here is how to do it on Circle CI in particular.
Copy https://github.com/citusdata/docker/blob/master/docker-compose.yml into the Rails project, and name it citus-docker-compose.yml.
Update the
steps:section in.circleci/config.yml. This will start a coordinator and worker node:steps: - setup_remote_docker: docker_layer_caching: true - run: name: Install Docker Compose command: | curl -L https://github.com/docker/compose/releases/download/1.19.0/docker-compose-`uname -s`-`uname -m` > ~/docker-compose chmod +x ~/docker-compose mv ~/docker-compose /usr/local/bin/docker-compose - checkout - run: name: Starting Citus Cluster command: docker-compose -f citus-docker-compose.yml up -d
Have your test suite connect to the database in Docker, which will be on localhost:5432.
Example Application
If you are interested in a more complete example, check out our reference app that showcases a simplified sample SaaS application for ad analytics.
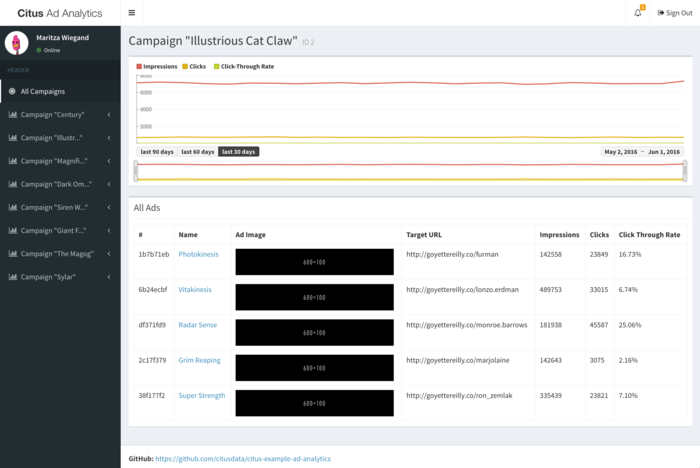
As you can see in the screenshot, most data is associated to the currently logged in customer - even though this is complex analytical data, all data is accessed in the context of a single customer or tenant.